In any case, the best options this law leaves you with are buying a pre-1994 residential or pre-1997 commercial toilet from a salvage company, or importing a new or refurbished toilet from Canada (or Mexico if you travel there, or are especially trusting with mail order transactions).
Where/What to Buy
You've got two main options. The first is a new 3.5 gpf toilet. These are still being made by all the major toilet companies for customers outside of the US, and can be purchased from any Canadian plumbing distributor willing to ship. Call around or check Fleabay. Note that I have successfully used Plumbateria in Calgary, Alberta, which sells both new and reconditioned toilets to their oppressed brethren in the US. Note that shipping on a toilet from Canada is steep, and usually runs about $110. A typical two piece toilet must be dismantled and shipped in two parts, each shrink-wrapped and boxed or crated individually.

There is no real disadvantage to getting a used toilet. Toilets are made of vitreous china, and are thus impervious to caustic cleaners and Drano-type drain clearers. Further, I am not aware of any parts in a toilet which can wear out, and yet which cannot be easily replaced. In short, toilets are forever! If you want to buy a used toilet, you can again get one from Canada, or you can seek out one locally from a building salvage company. The advantages of this include the fact that it is cheaper, that an older toilet is more likely to be ignored as "grandfathered" by an unsuspecting building inspector, and that you can go even higher than 3.5 gpf (4 is pretty common). Disadvantages include a bit less efficiency (e.g., they may do in 4 gallons what could probably be accomplished with 3.5 gallons). Note that it is possible that this inefficiency can be mitigated through the use of a dual-flush valve kit, although I have not personally tried one of these kits with a pre-ban toilet.
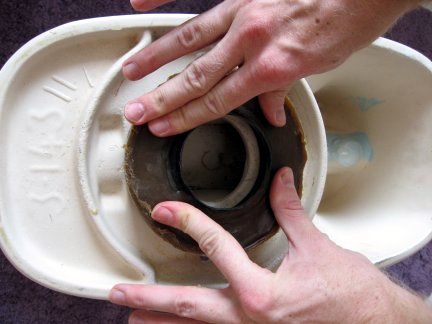
There are several types of toilets that are an option. First, the traditional washdown toilet which was commonly used up through the 1980's and early 1990's. A washdown toilet has two holes in the trap (the little alcove at the bottom fo the basin), a small one which is the water input, and a large one which is the drain. Water literally is flushed through the buttom of the basin. Advantages: small fouling region due to more water being stored in the basin, a larger trap, very thorough rinse of the basin. Disadvantages: uses a lot of water, and is somewhat louder than a reverse-trap style toilet. If you buy used, be sure and get a reconditioned toilet (with all new seals and moving parts) that has been acid-washed so you don't have to deal with mineral stains or other nastiness.
Note: I have read that in some places, washdown toilets are against building code. It's probably worth checking your local code to be sure, although I've personally never seen a building inspector open a toilet to check what type it is. Presumably the inspectors just assume the proper toilet variety in a newer home, or that the toilet is legally grandfathered for older homes. Perhaps you should keep your original low-flow toilet to substitute back in if you're planning on selling your home any time soon.
In contrast, the reverse-trap toilet has a single (drain) hole in the bottom of the basin. The toilet flushes water past the drain exit, thus relying on the Bernoulli principle to suction away the contents of the basin. Advantages: slightly more quiet than the washdown, and uses less water. Disadvantages: larger fouling region than the washdown, and a smaller trap at the bottom of the basin. Most modern 1.6 gpf toilets are reverse-traps.
Finally, the siphon-jet toilet uses a pressure assist jet to improve upon the reverse-trap design. Advantages: probably the only way to get the benefits of a high capacity toilet with only 1.6 gpf. Disadvantages: extremely loud (sounds like an airplane toilet up close, or dull thud anywhere else in the house), substantially more expensive than the other types of toilets, and may require an electrical connection to run an air compressor.
Selecting a Toilet
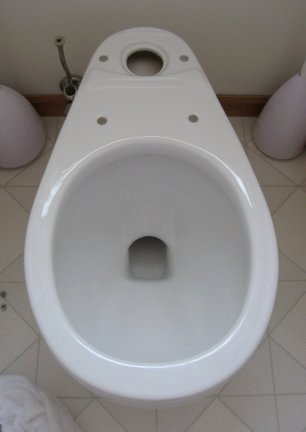
Capacity Most recent high capacity toilets will be either 3.5 gpf or 4 gpf. These are a safe bet because they use the same diameter drain pipe (3 inches) as can be found in any modern house with modern 1.6 gpf toilets. If you go even older (antique), you can find 5.5 or even 7+ gpf toilets, although these may require drain diameters as large as 6 inches, and may require the tank to be mounted high up on the wall.Rough-in The rough-in size is the measurement from the bolts that hold the toilet to the floor, to the wall being the toilet. If multiple sets of bolts exist, measure from the set ones closest to the wall. The standard rough-in size is 12 inches. Cramped bathrooms may have a 10 inch rough-in, while other bathrooms may go as high as a 14 inch rough-in. Be sure and measure this before you order a toilet! !!!BASE PHOTO W/ ARROW
One Piece vs. Two Piece One-piece toilets are more expensive than two-piece toilets (probably partly because of increased shipping costs), but quieter. Some people simply prefer the looks of one-piece models.
Round or Oval Bowl This is pretty much a matter of personal preference. Round bowls tend to drop off a bit faster, thus giving the bowl more depth. Oval bowls protrude another 2 inches from the wall. hich you chose is a function of comfort, and of aesthetics.
Installation
"To be or not to be, that is the question!"
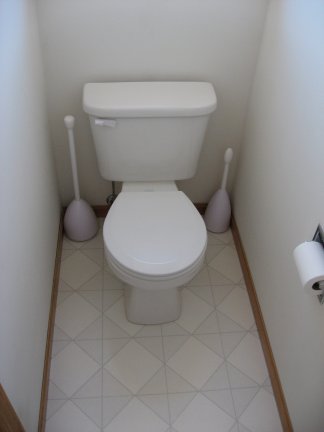
Step Zero The first thing you'll want to do is decide what is happening to your old toilet. Why bother with that now? Because if push comes to shove and you gotta take extreme measures to cut off some rusty bolts, it really helps to know whether you are chucking your old toilet in the trash, or whether you need to keep it intact. If your toilet is undamaged and can be cleaned up, check your local Habitat for Humanity and see if they want an old toilet (they seem to base this on brand, so know the brand of your old toilet before you call). If they don't, ask them who would. Usually you can find a pretty good assortment of salvage companies and charities who, believe it or not, would just love to get someone else's used low-flow toilet! (Freaks!)
Step One The next thing you'll need to do is find the supply valve for your old toilet and turn it off. Hopefully, you have a cut-off valve between the toilet and the wall. If not, you might need to go down into the basement and look for a cut-off, or worst case, turn off the master valve for your home until the job is done. If you don't have a cut-off next to the toilet, this would be a great time to add one. It's easy!
Shutting off the water supply valve
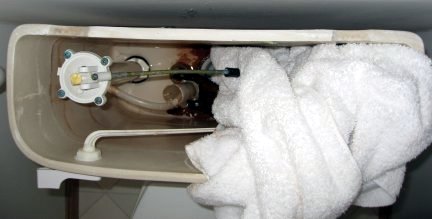
Step Two Now remove the top of the tank, drain it by holding down the flush lever until your reservoir is just about empty. Sadly, you won't be able to get all the water out of there just by flushing.
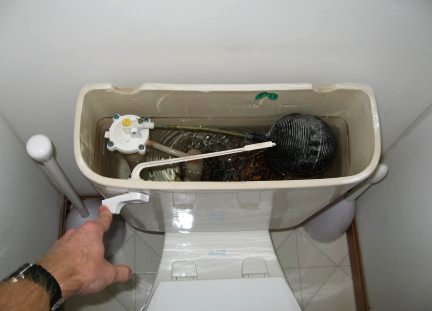
Draining the tank with an extended flush
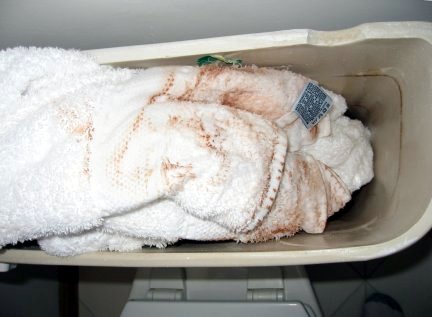
Now use towels to soak up the rest of the water in the tank. And the bowl. Yeah, sorry, but you've gotta get rid of that water in the bowl or it will be spilling onto your favorite bunny slippers and your carpet as you carry the toilet outside to the next chapter of its life.
Mopping up any remaining water
The water in your tank will generally be sanitary, but could contain rust or other mineral deposits from your water. In contrast, the water in your bowl will be as unsanitary as it gets. Obviously, to avoid diseases rarely seen in the civilized world since the 19th century, and to prevent permanent rust stains, you'll want to either find some white towels you can bleach the hell out of afterwards, or use something you can throw away afterwards. Yeah, this step kinda sucks. (I actually looked up this step in a couple of home improvement books, and they also say to use towels... go figure!)
"You used which towels? I want a divorce!"
Step Three Now you've got to unfasten your toilet from the floor. Most toilets are fastened by two nuts on the base of the bowl. I have heard that some others use four. Either way, your nuts may be hidden under fancy-looking caps which you can remove with a small screwdriver.
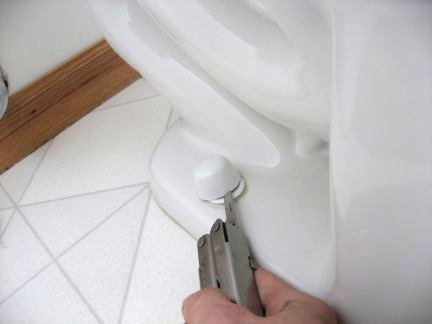
Removing your bolt caps (if any)
Now remove the nuts with a crescent wrench, box wrench, or what have you.
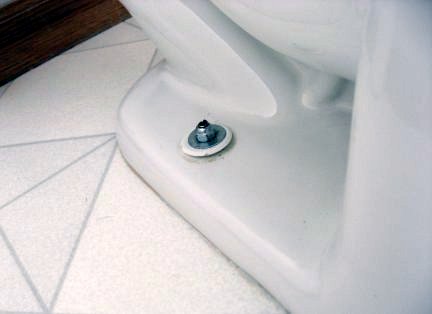
Uh oh, mangled bolts!
If your bolts were mangled, you'll need to cut them off at, or just below, the nut with a small hacksaw. Alternatively, if the bolts and nuts have rusted into a solid chunk, it may be easier for you to drill out the bolt with progressively larger drill bits until the nut falls off.
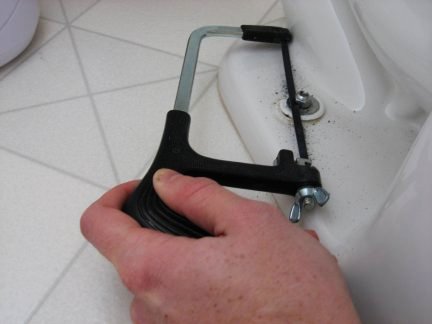
Removing nuts from mangled bolts
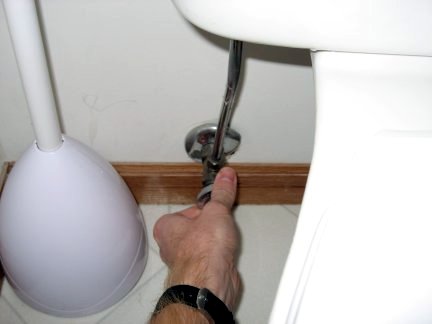
Step Four Next, disconnect the water supply pipe from your toilet. Usually, the fitting you'll need to loosen is on the underside of the tank next to the bowl. Use a pair of channel locks if it's too tight to turn by hand, and remember, turn counter-clockwise to loosen!
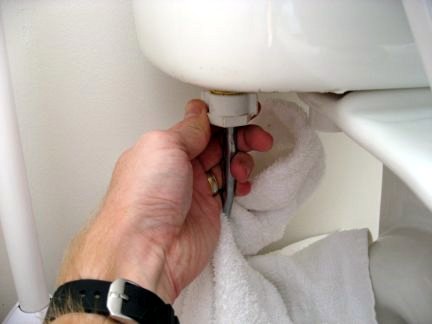
Disconnecting the water supply from the tank
Step Five Check to make sure you've removed all the nuts holding the toilet to the floor. Also, check to make sure your toilet isn't also connected to the wall. If it is, you'll need to remove those fasteners also. Now, remove the old toilet! You'll want to have a disposable or bleechable towel nearby to set the old toilet on. Or alternatively, just carry it straight out to the curb if you're chucking it.
If you had to saw through the T-bolts holding the toilet down, you'll want to remove any remaining pieces of those fasteners now. Next, grab a plastic knife or similar disposable non-marring scraper and scrape off the old toilet sealing wax. This wax may well be impregnated with all sorts of nasty bacteria. So after this step, wash your hands very thoroughly, and toss that plastic knife in the garbage. Or, save it in a special place for the next time you get audited by the IRS and want to offer your "guest" a light, hard-to-cut snack!
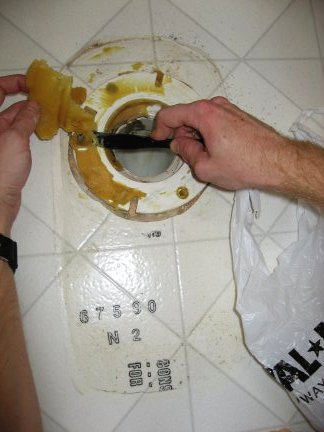
"Yuck!"
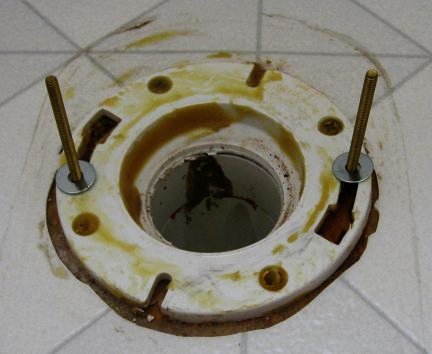
Finally, scrub your floor clean with your favorite bathroom cleaner. Remember that the "footprint" of the base of your new toilet may not match the old! As such, you want to make sure you've scrubbed away any old wax, plumber's putty, linoleum markings, or other stains while there are no toilets in your way. This may take a little bit of elbow grease if the old sealants are caked on.
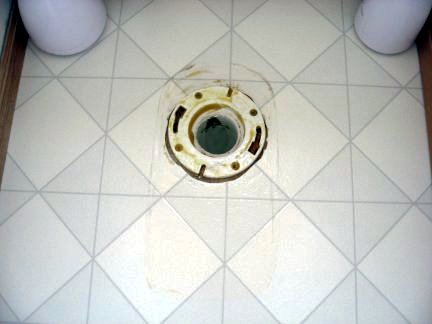
A somewhat clean floor, somewhat worthy of a new toilet -- still needs some work!
Step Six Put your new T-bolts into their slots in the drain flange, and then install the washers.
Installing the new T-bolts into the drain flange
Next, temporarily set your new toilet over the drain flange. Check to see if the toilet, as it naturally sits on this flange and your floor, is level. Make sure you measure in two dimensions: front to back, and side to side.
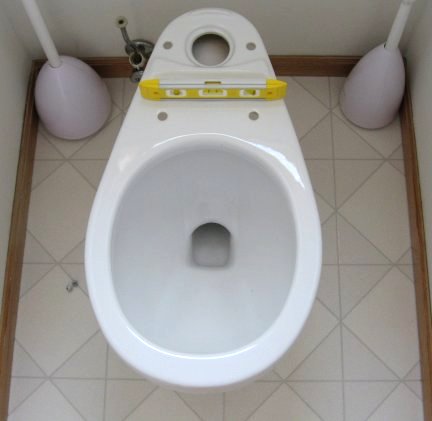
Important note: you'll want to make sure your toilet is level *before* installing your bowl gasket! (And if you decide to photograph your toilet during this step, you'll want to make sure you have the same light level for both photos or your web site will look crappy.)
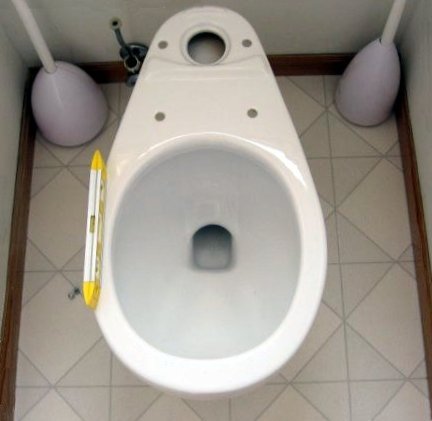
If your toilet isn't level in either of the above directions, you'll want to wedge some shims underneath level it out. Toilet shims are small wedges of a very stable, uncompressable, and water-and-corrosion-resistant plastic which work great for the application. Alternatively, if you don't have any toilet shims handy, you can also shim (albeit somewhat less precisely) with rustproof metal washers.
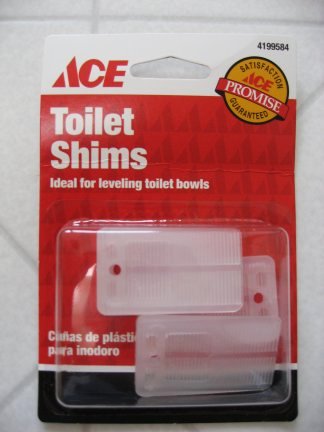
If your toilet isn't level, use shims like these to eliminate its inclination
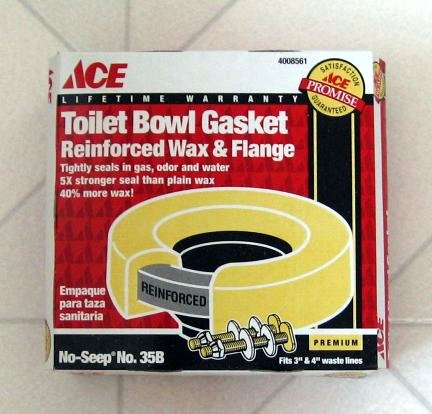
Now, carefully lift your toilet bowl off of the shims so as not to disturb them, and go find your toilet bowl gasket.
Step Seven Now it's time to install the toilet bowl seal. Flip the toilet bowl upside down so you can access the underside. If you're working on a rough surface (e.g., concrete) make sure you put down some padding so the top of your bowl doesn't get scratched up. Now carefully center the seal over the lip on the underside of the bowl, and press it into place. You needn't use a lot of force, just enough to make it stick in place. Later, when you set the bowl into place, the seal will squish into its proper form.
Installing the toilet bowl seal
Optionally, you can put a bead of plumber's putty around the outer rim of the underside of the bowl. Once installed, this will keep water and dirt from seeping underneath the toilet if it ever overflows or anything like that.
Step Eight Now carefully set the toilet bowl into place once more. Before proceeding, make sure you've got the toilet centered exactly the way you want it. Is it square with the walls/linoleum pattern, or does it look crooked? This is the time to make sure the toilet is sitting where you ultimately want it.
Use your body weight to press the bowl downwards, centering weight over where the pedestal touches the floor. This will squish the wax into the places it needs to go, and thus form a watertight seal with the drain flange.
Set the toilet into place and use your body weight to distribute the seal wax
Break out your level once again and make sure the toilet bowl is definitely level, and then fasten nuts onto the toilet drain flange bolts. These don't have to be insanely tight, but they should be more than hand-tight. Note: if you plan to use decorative caps to cover up your nuts/bolts, make sure you've got the right kind of washer installed before tightening everything down (see discussion below with regard to Step Eleven).
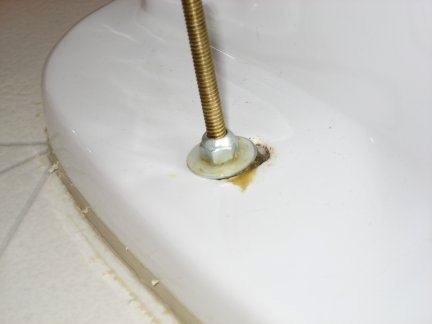
Installing washers and nuts
Note that once you've cranked the toilet down into place, it's a bad idea to remove or lift the toilet bowl up again for any reason. Minor adjustments are okay, but major adjustments can disrupt or dislodge the wax seal, and if you replace it without molding the wax back to its original shape, you may not end up with a watertight (a.k.a. sewage-tight) seal.
Step Nine If not already installed, install the spud washer in the bottom of the toilet reservour.

Installed spud washer
Step Ten Now set the reservoir on top of the bowl, so that the spud washer is pressed down into the toilet bowl inlet...
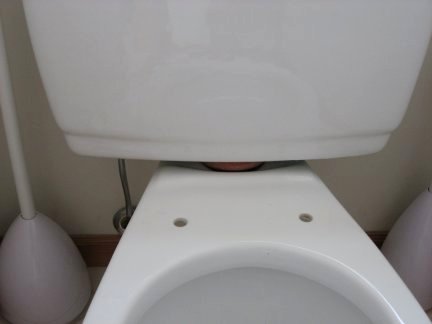
Installing the reservoir
...then place the reservoir washers and nuts onto the reservoir bolts, and tighten the nuts down into place.
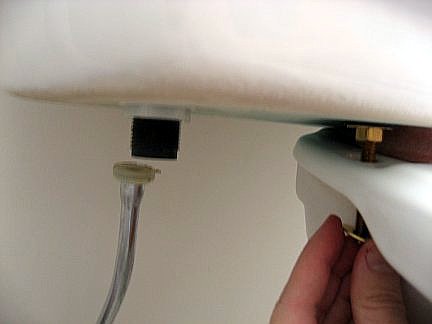
Installing the reservoir nuts
Step Eleven Time to cut down those bolts.
If your bolts are longer than they need to be (i.e., will they accomodate a decorative cap on top of them?), it's time to cut them down. If you're really paranoid, you might do this after Step 12, but it's pretty unlikely that you'll need to take these nuts off again. Before you do the cutting, make sure you've got washers which match up to your decorative bolt caps, assuming you want to use caps; see photo showing the caps below.

The final cut
Now you may want to install decorative caps on top of the bolts so they look a little less ugly. Usually, these just snap down onto special nylon washers which are sold with the caps.
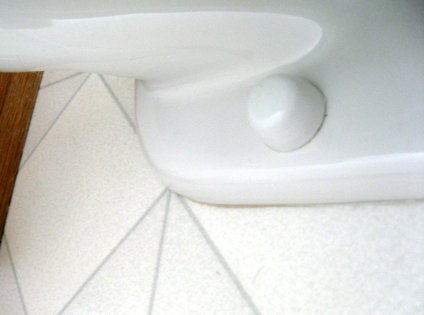
Nothing says style and elegance like disguising your fasteners as little white pieces of plastic!
Step Twelve Now hook the water supply up to the reservoir.
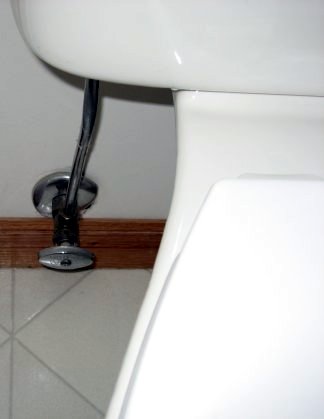
Hooking the water supply back up
You'll note that in the above photo, the supply line is a solid piece of metal. Sometimes, the inlet on your new toilet reservoir will be in a slightly different spot than the old one, and so the supply line won't quite reach where it needs to without being under constant stress. A great fix for this problem is the use of flex line, as pictured below, and sold at your local hardware store.
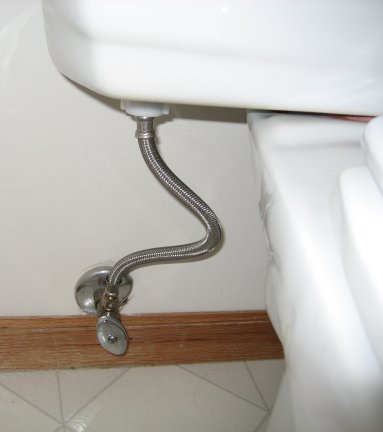
It's all about the flexibility
And finally, turn your water supply back on. Your reservoir should fill with water up to just below the top of the black plastic standpipe. If you need to adjust the water level, try turning the screw at the top of the float arm, which will let you adjust the angle of the float relative to the water.
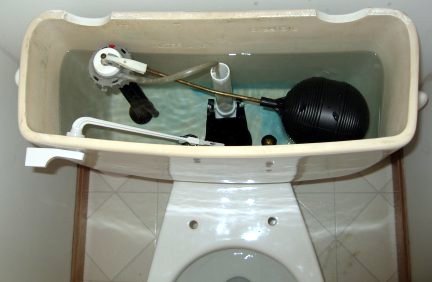
Check your water level, and make sure there is no water leaking anywhere
It's also a good idea at this point to check for leaks in your system. Most importantly, check: A) where the supply line connects to the reservoir, B) where the reservoir connects to the bowl via the spud washer, and C) where the pedestal of the toilet bowl meets the floor.
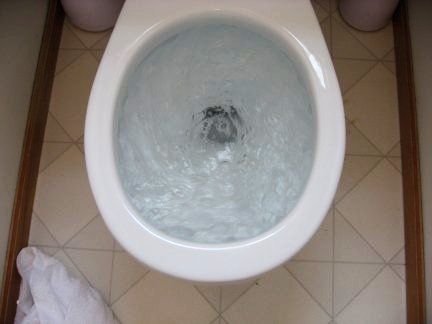
Gaze in wonder at the spectacle of mankind harnessing nature which is embodied in your new, high-power flush. In numerous ways, it's like a miniature Niagara Falls!
To crown your achievement, you may want to go shopping for a new toilet seat. You'll find that nearly every type of seat imaginable is out there somewhere, from transparent plastic seats with a smattering of your favorite objects (be they coins, shells, or even razorwire strands) suspended therein, to high-tech hydraulic seats which eliminate slamming such that your loved ones will never again be startled at 4:00 AM when the half-closed seat slips out of your half-asleep fingers. Besides aesthetics, primary buying considerations will include whether your toilet bowl is round or oval, and whether you want plastic or perhaps something sturdier (but colder on a chilly night, although self-warming seats are now an option!) If you fancy a bidet, I highly recommend Toto's Washlet series of products. While a little pricy, these units are a great alternative to a separate bidet for those short on bathroom floor space, and work far better than their kludgy nature would initially suggest.
Email the Author
The author of this page can be reached at webmaster-at-freeexistence.org. Replace "-at-" with "@" in the "To:" line.Reminder: All content on this site is automatically copyrighted by virtue of the Berne Convention for the Protection of Literary and Artistic Works. Should you disregard this notice, Rufus the Dog will hunt you down and bite your ass.